Monday, December 27, 2010

Merry Christmas!

Sorry for being quiet for a while. I've been meaning to post for the last few days but parties, family and Christmas activities just did not allow for it. Oh, I'm having a really meaningful Christmas season! Aside from the fact that this is the first Christmas for Ron and me as husband and wife, I spent Christmas with his big, happy family in Legazpi City. A bit sad because it was my first Christmas away from home but they were so wonderful that I so enjoyed the few days I spent with them nevertheless. The whole family spent the day before Christmas at a far flung town in Albay, giving food and old clothes to some 15 families. It was really heartwarming to see how happy one can make others by simply sharing. Here are a few pictures I took.


December 26 came and I excitedly left for home to attend my mom's birthday and spend the rest of the season with my family. It's just sooo wonderful to see everyone again after being away most of the year. Oh and I managed to complete my gift for Mama too! hehe I'm happy to say she loved it very much..

The box I decorated to store the mini album/scrapbook in.


A closer look at the saying that was just right for my mom..


To the birthday celebrant with love..


My Mama.


Zooming in on the pretty flower embellishments.


Just showing that I forgot to erase the pencil marks. hahaha


December 25 may be well over but lucky for me I live in the Philippines where people celebrate the longest Christmas season in the world! Visit our country and you'll see Christmas decorations and hear Christmas carols until middle of January. hehe It's true! So even though this may be a bit late for other people, straight from the heart of a proud Filipina, Merry Christmas to you and to your loved ones! Wishing you a better year ahead wherever you may be out there.. May your days be filled with laughter, memories, love and a whole lot of creativity! =)

Thanks for dropping by!

Tuesday, December 21, 2010

For the Most Wonderful Mom in the World

My mom and I have always been close but we became much, much closer three years ago when I moved from Cebu to Manila for work. Ironic, I know. Our relationship was inversely proportional to the physical distance between us. I moved farther away, we got closer as mom and daughter. Maybe it was because I already had money for long-distance calls. hehe Since then, she has been my confidante and I hers.

So anyway, it's my mom's birthday on the 26th! And you're invited to come and celebrate with us in Zamboanga del Norte!! hehe

I'm {desperately} trying to make her a handmade mini-album/scrapbook that I know she'll love.. With only a few days until the event, I really, really hope I'll get in done in time. So far, here are a few pages I've completed..


I also plan to have a page for each family member with a solo picture (just like the one above) where he/she can write sweet nothings for Mama..

So what do you think? I hope she won't see this post before we give her the gift.. ;)

Thanks for visiting!

Wednesday, December 15, 2010

Light Box

Inspired by Artisan's post about her light box, I made myself one a few days ago in the hopes of improving my photos a bit.. hehe Well.. I'm not really sure if I did it right. At least it looks like a light box.
Obviously, I don't know much about photography. haha But I do know I need a brighter light! Not bad for a first though..

Thanks for visiting!

Tuesday, December 7, 2010

Lesson 5: Protecting Your Memorabilia

Hello again! It's been a while since my last post. I've actually created a few cards over the past few days and attended a one-on-one scrapbook
ing class over at Ms. Helen's scrapbook shop called Memory Lane. I really had NO idea it was going to be one-on-one! hehe Good thing Ms. Helen was so patient at teaching me.

So the reason for having no pictures to post is that I left my good ol' camera with my sister-in-law. I know, I know. I'm such a clutz. But I hope to get it later today. Then I'll post my recent projects including the layouts we created at Memory Lane soon!

Let's proceed to our lesson then. Sorry for being so late at posting, by the way. Lesson 5 gives us eight commandments on how to protect our memorabilia. Yes, of course it goes well beyond using acid-free stuff..

1. Liquids destroy photos, negatives, articles and a whole lot of stuff!
- Whoa! Really? Wow, who would have thought... hehe Sorry, I'm in a playful mood at the moment. Yes, of course they do. So Rule 1, absolutely no liquids in the work area except for glue and paint please.. The author also suggested to keep your work area away from water-prone areas such as pipes (they may leak), open windows (it might rain), etc.


2. Always have a back-up of your digital photos and digital layouts.
- At the moment, since I'm not yet fully into digital works and I've only created a few layouts, I use a flash disk to create a back-up of my "arts and crafts" folder. But then I guess sooner or later, I'd have to get me one of those external hard drives for more space.

3. Keep all heirlooms out of direct sunlight.
- So, yep, better to keep away from that window then. Whether it's rain or sunshine, more harm is done than good. Sunlight, according to the author, eventually diminishes the quality of your photos.

4. Extreme temperatures damage them too!
- Okay, do I have to say it again? No no to windows.. Have your work area in a place where humidity is low. Like maybe if you're here in the Philippines and you live in a multi-storey house, you might want to avoid setting up your area on the top floor since humidity tends to be pretty high up there. Even if your room will be airconditioned when you're working, it would still be pretty humid when you're not around and the cooler is off.

5. Oil on fingertips will eventually make fingerprints on photos visible over time. Handle photos carefully, touching only the outer edges. Wash hands frequently or use acid-neutralizing wipes. Use lightweight cotton gloves to keep pictures pristine.
- Hmm.. Let me be honest here.. I don't think I'd ever get to the point where I'd be wearing gloves and looking like a detective rather than a scrapbooker. hehe Careful handling, yes. Gloves and wipes? Nope. Well, maybe baby wipes. I don't think I'd actually bother buying acid-neutralizing ones. But then that's just me. Of course, credibility and experience being the basis, I highly think you should follow the author's advice. She knows so much more than I do. hehe *wink*

6. Handle and store your photos and negatives properly to avoid scratches and tears. Use page protectors, acid-free envelopes, plastic sleeves or sturdy containers.
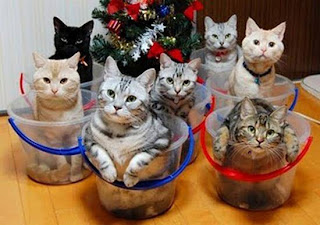
- I've only gotten around to having our photos printed just last night. So I guess it's safe to say that as of the moment, they're in a photo envelope, unsorted. I think I'll keep them in a box much like the one below as soon as I have spare time.


7. Avoid materials made of polyvinyl chloride (PVC) or polyvinyl acetate (PVA) as these chemicals tend to destroy your photos over time. Look for acrylic or polyester (polyethylene and polypropylene) materials.
- Eh? *scratches head* Say what now? hehe Sorry, my vocabulary on scrapbooking and materials are pretty much limited to the ordinary, everyday words. But um.. I guess if you have the time and patience to look for the appropriate storage supplies, acrylic and polyester are the materials you should be looking for.

8. Never assume that a paper is acid-free unless specifically stated in its own packaging. Not even if it's bought from scrapbook stores. Safest way to check would be to conduct a pH Test with a pH Test Pen.
- Haven't seen one of those pens but I think they'd be available in scrapbook shops of course. I'm not very particular on the acidity of my papers though I do think I should be. I guess it's because I'm still in my "practice" mode and not really going professional at it yet. Plus, of of course, the usual problem of having limited funds. Acid-free stuff is a bit costly. hehe
There you have it folks. Eight commandments. To follow or not to follow? Depends on you actually. If you have the time and funds for it, I say follow everything. These are advices of an expert who has been scrapbooking for years. Better be safe than sorry I'd say..

Til next time! Thanks for dropping by!

Thursday, December 2, 2010

Happiness


Ok, I know I said I won't do this but I'm getting addicted to digital scrapping! Heeelllp!! It's just that it's so convenient and less time-consuming, I couldn't resist trying a layout or two... Oh and it costs nothing! I just did this using free stuff from Scrapblog. But no worries, I'm still committed to learning the traditional tricks of the trade.

This photo of Ron and me was taken by Papicture Studio during our prenuptial shoot. Don't we look happy? We were actually laughing at having to be so corny as to chase each other on the beach! haha

Thanks for dropping by!

Wednesday, December 1, 2010

Sunny, Happy Layout


I couldn't resist creating a digital layout for this photo. hehe This is my version of a bright and cheerful layout. Focal point is a photo of me, my sister Rezza and our dear Mama. Taken at Hong Kong Disneyland a little over two years ago. It was the best trip ever! We should do that more often, folks. =)

Thanks for looking!

Friday, November 26, 2010

Mia, the Slice Machine

The secret to the complicated flower and letter cut-outs I use for my cards? Why, Mia of course! Mia, the slice machine, is an innovative electronic product of Making Memories which cuts shapes and letters that are programmed in a Design Card. A design card looks exactly like an SD Memory Card but is formatted exclusively for the Slice Machine. She's very user-friendly, only 6 steps to follow actually.

1. Place your paper over your glass mat which comes with your slice.
2. Place your slice machine over your paper.
3. Insert the design card into the card slot and turn the machine on.
4. Choose a design.
5. Choose a size for your cut-out.
6. Press the "start" button and voila! You now have your cut-out!

I got Mia as a second-hand buy. She used to be owned by a famous actress/host here in the Philippines who decided to upgrade to a much more expensive and versatile cutting tool. She was just so pretty I couldn't resist it. Ron and I definitely had no budget for her. So I put into good use my persuading skills and asked my dearest Lola (Grandma) to buy her for me! I just love my Lola. hehe I don't have pictures of Mia yet but here are pictures of her identical twin sister which I got from the internet..


MM Slice Machine with charger, cutting mat, design cards,
glue, glue applicator, pamphlet and blades

And here's what she can cut!


Holiday Words and Expressions Design Card


Handwritten Design Card


Home Sweet Home Design Card


Think Pink Design Card


Now do you understand why I say she and I will be best friends for a very long time? hehe Thanks for looking!

Hello Card

I'm really getting addicted to making cards these days. Almost every night, before I do my rituals for bedtime, I try to make at least one card to add to my collection and of course for practice. I find them a lot easier to do since each one is only around 1/8th the size of a 12x12 scrapbook layout which means less materials used and faster completion time. PLUS, they're much more economical to make for practice. You won't need to use acid-free or lignin-free paper and all that stuff since cards are not really meant to last as long as you would want scrapbook layouts to. The rule is, if it's with pictures and you want it to be good as new when you show your layouts to your children and your children's children, use acid-free or lignin-free materials to avoid discoloration and preserve your photos better. But if it's just cards, then there's really no need for that right? So you get to have more freedom in choosing your materials and they won't cost you as much as acid-free stuff do. You can even use cheap materials like cartolina or recycled paper if you want. All it takes is a dab of creativity!

Kindly double-click the image to understand the doodles. hehe I used All About Scrapbooking papers which are available in National Bookstore for this card. They're a bit cheaper than other product lines like Webster's Pages or Basic Grey or Bo Bunny and other imported brands. The main reason is that All About Scrapbooking is actually a local product of Fistar Distributors Corp. Of course, I would be lying if I say they have the same quality as the imported ones (the designs are really cute!) but then if you're still practicing and want to have it more affordable, All About Scrapbooking would definitely be the way to go.

To make this even more affordable, I used plain white cartolina as the card base and only stuck the patterned paper to design the front. hehe I also tried designing the envelop to match it with the card by using just a couple of cut-outs from Mia, my Slice Machine.


I also tried creating dimension by highlighting some parts of the word "hello" with dotted lines to create a bit of depth.


So what do you think? Thanks for dropping by and have a happy day!

Wednesday, November 24, 2010

Lesson 4: Photos: Sorted and Scrapbooked

Since photos are obviously essential to any scrapbook layout, anybody's craft life would be so much easier if they are kept organized or sorted. Hmm.. Unfortunately, that's easier said than done. Especially for a lazy and untidy girl like me! I've even adopted the motto, "Creative minds are rarely tidy". haha But yes, I know I need to get organized if I want to avoid spending two whole hours looking for my scissors!

So, moving on..

Lesson 4 talks about sorting photos and deciding how and where you would want to store them. As to where to store them, you would have to decide between keeping them in a photo album in which the whole family can go through and appreciate them until you'll have time to use them one by one in your layouts OR you can store them in boxes. For storage, you can choose any of the following ways:

- Chronologically
- By Theme
- By Person or Group
- By Portrait
- By Event

As you know, I'm kind of concentrating on cards for the moment so I haven't really gotten around to getting our pictures printed, let alone sorted. hehe

Speaking of organizing, here are a few pictures of taking the task to the next level!


I hope you found this lesson helpful! Thanks for dropping by!

Lesson 3: Essential Scrapbook Supplies

Sorry for doing such a lousy job of keeping up with my scrapbooking lessons. I know it's been days since I posted Lesson 2. No excuses, just plain laziness and procrastination. hehe So anyway, Lesson 3 gives a list of the scrapbook supplies you will need. It's really helpful especially if you're new and don't know where to start. There's the "Essentials" which is a list of what you SHOULD have to make the most out of your creativity and then there's the "Upgrades" which is a list of what you WOULD WANT to have. hehe

Erm.. It's kind of a really long lesson and lists, so would you mind very much if I'll just give you the links? Please bare with me as I'm still trying to finish all my deadlines at work and still keep this blog updated (though I enjoy blogging much more *wink*). Just this once, okay? You'll find the lesson very helpful and I think you'd want to get this lesson in its full version anyway.

To view and print the "Essentials" list, click here.
To view and print the "Upgrades" list, click here.

See also the tutorial which gives a comprehensive discussion on the items in both lists. It can help you decide in choosing your supplies. Sorry, gotta run. Need to finish my paperworks before I have to go on official travel to Batangas in the morning. Have a happy day!

Tuesday, November 23, 2010

Everyday Cards

Taking a break from my Christmas Card craze, I tried making everyday cards last night. And I'm actually quite happy with what I came up with. hehe (I-love-my-own mode: ON) Got insipirations from a Creating Keepsakes magazine. Unfortunately, I was only able to finish two before Ron, my husband, finally gave up on trying to save his digital garden from zombies and said to call it a night since it was already 1AM. I tried some of my stamps on the cards and used Mia, my slice machine, too. Oh I just LOVE my slice machine! Makes creativity all the more creative! hehe I know I promised to blog about her. But forgetful old me keeps on forgetting to take pictures. Maybe I can come up with something tomorrow.. SO, back to my everyday cards. Well, let me know what you think.


Enjoy your day!

Friday, November 19, 2010

Christmas Card: Attempt Nos. 2-5

Well. I'm doing such a bad job at keeping this blog updated. Tsk, tsk. Pretty disappointed with myself actually. SO, to make it up to anyone who's stumbled upon my blog, I'm sharing with you images of the Christmas cards I've made over the weekend. Weeks ago, I came up with this goal to practice crafting by making Christmas cards for relatives. My progress with that goal is the only thing I'm proud of as of the moment. hehe


Sorry about the lousy picture-taking skills. hehe Hopefully, when Hubbs and I have moved to our own house, I'll have more room to take better pictures.

Hmm.. A few more updates. I'm taking an actual scrapbooking class on December 4 at Memory Lane. I'm really excited about it and I hope to learn lots of new stuff! I've also found a support group for all my scrapbooking needs! I joined the scrapbook-exchange club. I know, I know, I'm getting quite addicted to this. I'm doing quite well actually. haha Oh and I've bought a new toy!!! I got a Slice Machine! I'll introduce you to Mia, my slice machine and future best friend in the art of crafting, in another post. Right now, I've got to get back to my real job (the one that puts food on my table). hehe Thanks for dropping by!

Monday, November 15, 2010

Lesson 2: Creating Your First Layout

I finally got my second lesson! Yehey! Actually, I resubscribed. I still don't know what ever happened to my first subscription..

Lesson 2 talks about how to create your first layout. I distinctly remember feeling overwhelmed with all the layouts I've seen in the internet and I felt so incompetent. haha They're really, really good. But this lesson has shown me that it doesn't have to be that complicated. A layout can only be as complicated as how you want it to be. You can actually see a video they've prepared to demonstrate how unthreatening it can be! It's a must see, I tell you. View it here.

So these are the things you have to consider when creating your layout:

  1. Pictures - As mentioned in the first lesson, you don't have to get ALL of your pictures of an event. You simply have to choose one or two that best represent it.
  2. Theme or Concept - You can refer to your pictures for this one. See what theme would be best. It can be anything like Christmas, beach, summer, reunion, etc.
  3. Color Scheme - Pick the colors, papers and patterns which will go best with the theme you have chosen. A lot of papers actually come in packs with each pack representing a theme. You might want to consider getting one of those if you're just starting. Just to lessen the confusion. *wink* Like for my Christmas cards, I got a Christmas-themed pack of 12 papers (plain and patterned) that all look very Christmasy and actually go well when partnered with each other.
  4. Embellishments - Again, refer to your photos for this one and think about what types of embellishments you might want to use to bring more life to your layouts. You can use buttons, ribbons, chipboards, die-cuts, flowers, etc. Try to choose those which will also go with your theme and color scheme.
  5. Unity - Of course, the most challenging part would be bringing them all together. Scour the net for inspirations on how you might want to get them all in your cardstock base. A lot of books that give ideas for layout sketches or floorplans are also available in scrapbooking shops.
So this is my first (very first!) layout.. Now, be kind, I'm new. hehe


For pictures, I chose two of my adorable baby cousin Andrea. Theme of course is Baby Girl. Colors are pink, violet, yellow and other pastel shades. For embellishments, I chose corner stickers for the pictures, a flower, some die-cuts and stamped words and images. I didn't use any ribbons here. What look like ribbons are actually just paper cutouts. Cool, huh?


I still don't have any die-cuts or even templates of letters so I did her name by hand. Well, when push comes to shove, you gotta be creative. hehe I practiced with a pencil in my sketchpad first before doing it in a cardstock using a marker. Can't afford to waste cardstock!

The lines and heart under her name are actually stamped images. I used magenta and violet inkpads.


I did a little journaling too! hehe Just to put some words to the pictures.

So that's my first layout. I really enjoyed doing this and I hope to make many, many more layouts in the future! hehe

I hope you got something out of this post though I think my excitement might have made some of the things I said incomprehensible to some. hehe Just remember that it will be YOUR layout. Everything in books and the internet are just guides. In the end, it will be your creativity that you have to exercise. Make it yours. You can't go wrong. *wink*

Sunday, November 7, 2010

Christmas Cards: Attempt No. 1

After my first visit to Ms. Vivian's Lasting Impression, I got so excited I just had to try my stuff out right away! The great thing about traditional scrapbooking compared to digital is the dimension you can create with papers, embellishments, glitter, and of course, mounting tape!

So for my first card.. Drum roll please.. Ta-da!!


I just got a plain silver cardstock for the base and used 2 patterned cardstock and another 2 in red and green. The 3 Christmas trees are embossed die-cuts I bought at Papemelroti about a week ago. I embellished them with gem stickers which I had since forever but never really gotten around to using.


I mounted them to frames made out of red and green cardstocks and mounted them again to my card. That created the dimension I wanted. I also got a vellum image of the phrase "Merry Christmas" and also mounted that to my card. It's a pretty simple one but I'm just happy I came up with the design. Took me a long time to imagine it. hehe

Well.. let me know what you think if you feel like it. Have a happy day!

Lasting Impression

Okay, honestly, I don't know what happened to my e-classes. I'ts been almost a week since my first lesson and up 'till now, I haven't received my second! Hehe I'll try to check their site for a solution to this. SO.. while I haven't gotten around to doing that, I'll share about my meeting with Ms. Vivian instead! Yep, met her, visited her store and bought my first loot!

Actually, I though Hubbs and I were visiting her house where her stuff would be. I never really thought Ms. Vivian had as large a collection as she apparently did. And what I thought was a house, was actually a pretty big store. And oh the supplies she has! Believe it or not, I spent 3 full hours just looking through her stuff and I wasn't even able to check everything out! The store was absolutely gorgeous.. and so complete. She had everything: inks, dies, die-cutters, stamps (cling, clear and rubber!), cardstock (stacks and stacks of cardstock!), albums and SO much more! They also sell online. You can check their store here. But nothing compares to personally visiting their shop. It actually made me want to buy everything I saw! But of course, budget didn't allow for that. Bummer.

Ms. Vivian also taught me the basics of rubber stamping. From how to apply ink to the stamps to cleaning them. She even went as far as teaching me how to emboss! Now, if you've been doing this for a few weeks now, you'd laugh and say this is pretty basic stuff.. hehe But I'm a beginner, everything's pretty amazing to me! I was even amazed at how simple it actually was. hehe I p
lan to go visit again the next time budget allows. hehe One thing I realized is that this is NOT a cheap hobby at all.. hehe But it's absolutely rewarding..

A few pictures from my visit..


I loved this display very much.. The dolls and tin cans
at the top shelf complemented the beautiful supply of cardstock.


Inks of every imagineable color!


I told you.. Stacks and stacks of cardstock!! Amazing, huh?!?


Thanks for dropping by and have a great creative day!!

LinkWithin

Related Posts Plugin for WordPress, Blogger...